

Introduction to NextJS: The React Framework for Production
Let's take a look at the super framework that is growing rapidly in popularity among developers


Hello there fellow devs! Welcome back to my blog. In today's article I'm hoping to give you a beginners introduction to NextJS- The React Framework for Production. By the end of this article, you will have a solid understanding of NextJS and it's features and how you can easily setup NextJS to use in your next project.
What is NextJS and why you should use it?
NextJS is a framework built and maintained by Vercel. As mentioned in the official docs,
Next.js is a flexible React framework that gives you building blocks to create fast web applications.
This means that, you can use React to build the UI of your application and additionally implement and adopt NextJS features to solve more "server/backend" related problems like data fetching, routing and integrating with third-party tools just to name a few.
Pre-rendering
This is a feature that allows your application to be either Statically Generated (SSG) or Server Side Rendered (SSR) compared to a Client Side Rendered (CSR) React application.
Static Site Generation is the process of compiling and rendering a website or app at build time. The output is a bunch of static files, including the HTML file itself and assets like JavaScript and CSS.
Server Side Rendering is the process of converting HTML files in the server into usable information for the browser.Whenever you visit a website, your browser makes a request to the server that contains the contents of the website.
Client Side Rendering is the method of rendering content in the browser using JavaScript. So instead of getting all of the content from the HTML document itself, you are getting a bare-bones HTML document with a JavaScript file that will render the rest of the site using the browser.
Each of these methods have their own advantages and disadvantages over one another, stay tuned for a future article comparing these 3 methods. But in short, SSG, SSR have more advantages over CSR, like good SEO, faster page loading, optimization and are more preferred by developers.
Routing
NextJS offers a a page-based routing system (with supports dynamic routing as well). This implies that you don't need to worry about writing code for routers, we just create a file with the name of the page inside the pages folder and that's it, you just created a new page in your application. I know it's that simple.
This feature has saved me a lot of trouble and time compared to regular React, where I have to implement a routing system by myself.
Full-Stack capabilities
As I mentioned above, NextJS is esentially a framework built on top of React to to solve more "server/backend" related problems. This is a really powerful feature, as it provides you the all the tools and structures to build a full-stack application. Especially in the case of a React developer who is usually considered as a Front-End developer, can easily integrate back-end code to his project. This means you can write your own APIs, add authentication systems, fetching data, storing data, integrating to databases all while working on a codebase you are familiar.
This is one of the main reasons I chose NextJS, since it is essentially like building a React app with few extra lines of code to add backend functionality.
Using NextJS
Now that we know why NextJS is such a powerful tool that is growing rapidly in popularity, let's see how we can start using NextJS in your next project.
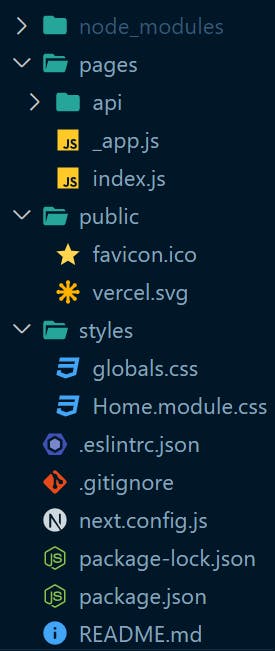
Step 1: create-next-app
Getting started with Next is easy, just as you would type in npx create-react-app your-app-name in your terminal to spin up a new project, you do the same thing for Next, but this time, it's npx create-next-app your-app-name.
Just like that and you are ready to start development with NextJS.
If you want to build a Tailwind + NextJS project, I suggest you use this Next.js + Tailwind CSS example or follow this guide.
Once this is done, your project would be very similar to that of a regular React app.
Step 2: npm run dev
Now that you have created your project, type in npm run dev in your terminal and navigate to https://localhost:3000.
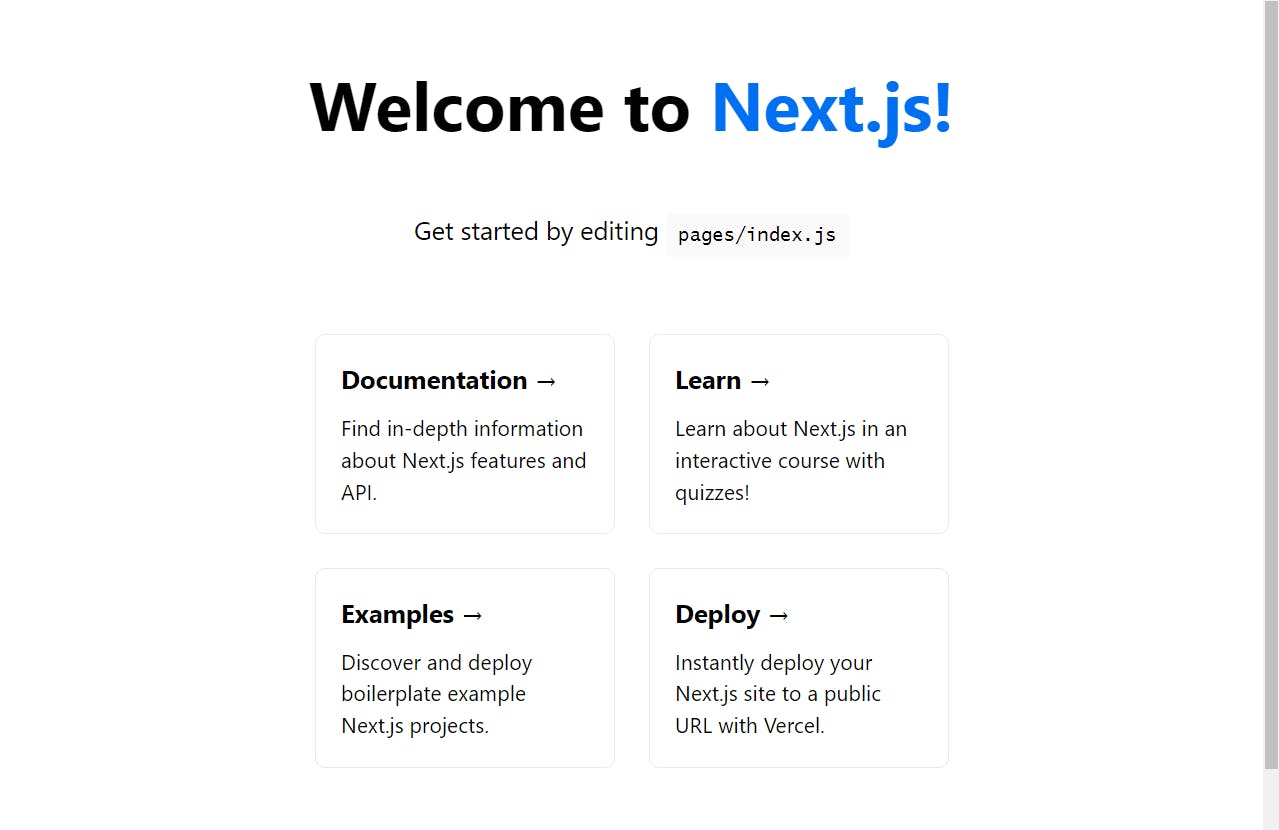
That's it! You have created your NextJS project. Start editing index.js inside the pages folder and see the change immediately, thanks to another feature called, Fast Refresh.
My experience using NextJS
As a React developer myself, I was really excited about tools that were built on top of React. I started using NextJS about a few months ago, when I really started focusing on building full-stack apps. I scoured through the internet to find ways to build a full-stack application using React. That's when I learned about NextJS.
Learning Next was really fun and easy for me because I was able to write code the same way I used to when building frontend applications. In my opinion, at least for me, Next has a really shallow learning curve, because I started off by just reading a few pages from the NextJS docs and that was it for me. Long before I knew, I was already building a Next app, that's how I built TweetSnap, a simple tool that uses the TwitterAPI to convert tweets to images. I was able to build this as my First NextJS Project.
Conclusion
There you have it! Thanks for reading this article. I'm hoping that this article was able to provide you a solid understanding of NextJS, it's features and how you can use it. Refer the following links that provide more resources and info on NextJS. If you enjoyed reading this article, please share among your friends 🔗 and give a like 💙. Also let me know in the comments down below 👇, for future articles.
More Resources
- Official Docs
- Working with APIs in NextJS
- NextJS examples with different tools like tailwind css, styled-components, auth0, graphql, next-auth, docker and many more
- A really well built course on building a full-stack application with Next, Prisma and Supabase by Grégory D'Angelo