


Hello guys, welcome back to another article under the Fundamentals of Git series. In the first post under this series, we discussed about Git and Version Control Systems. In today's article, we'll be installing Git on our local machine, and correctly configuring it the first time we use it. So without further delay, let's get started.
Installing Git
Before installing Git, just check if you already have Git installed on your machine. To do this, type the following command on your terminal.
git --version
If you get an output similar to the following, it means you already have Git installed, so you can skip to the configuration part.

But if you didn't, don't worry, I've got you covered.
Installing Git on Windows
Installing Git on Windows is pretty straightforward.
- Firstly head over to the official Git website.
- Download the correct and latest
.exefile depending on your version of Windows -34-bitor64-bit. - Then run the downloaded file.
- Follow the instructions on the installer (mostly, you'll have to click
Nexta bunch of times) and you're good to go.
Installing Git on macOS
There are a few ways in which you can install Git on macOS, but I recommend using either of the following:
- Installing via Homebrew
- Firstly, download Homebrew from here if you don't already have it on your computer.
- Then type the following command on your terminal
$ brew install git
- Installing via MacPorts
- Firstly, download MacPorts from here if you don't already have it on your computer.
- Then type the following command on your terminal
$ sudo port install git
- Then type the following command on your terminal
- Firstly, download MacPorts from here if you don't already have it on your computer.
Installing Git on Linux
The easiest way to install Git on Linux is using the package manager of your choice. For example, if you are using Debian/Ubuntu, type the following command on the terminal:
apt-get install git
Note:- The command to install Git is not the same for all package managers/distros. So choose the correct command from here
Configuring Git
Now that we have Git successfully installed in our system, we have to make some configurations before we start using it. These configuration settings are:
- Your name
- Your Email
- Your Default Editor
- Line Endings
Configurations in Git can be specified at three different "levels". These are:
- System Level - Settings specified in this level are applied to all users on your machine.
- Global Level - Settings specified in this level are applied to all repositories of the current user.
- Local Level - Settings specified in this level is applied to the current working repository/directory.
But for now, we'll be working with the Global Level to apply the settings required for the first-time use. To start configuring, open up a new terminal/command prompt and start entering the following commands:
git config --global user.name "Your Name"Here we configure the name we prefer to choose in our repos, make sure to type your name inside double quotes
"", this is because we have a space between our names.git config --global user.email you@email.comHere we configure the email we prefer to choose in our repos, for our email we do not need double quotes since there isn't a space in our email.
git config --global core.editor "code --wait"Here we configure the editor/IDE we prefer to choose. Here I'm going to choose my default editor as VS Code, hence the command
code --waitinside double quotes. If you are not using VS Code and want to use a different editor as your default editor for Git, please refer to the following: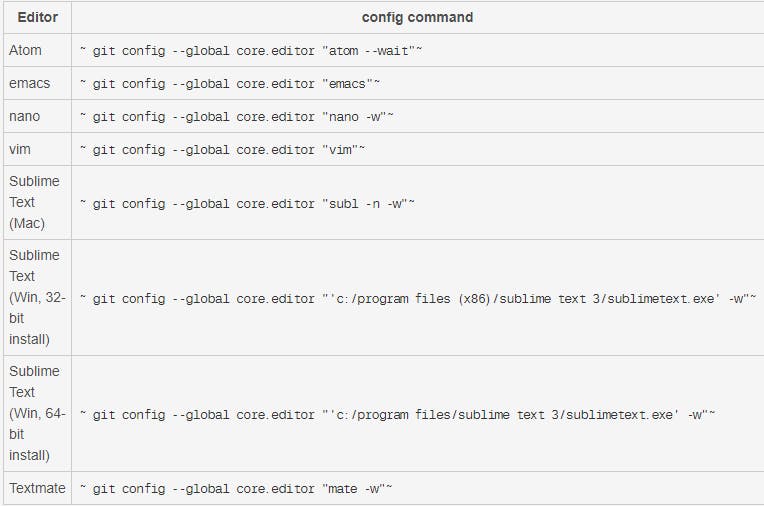
Credits: Atlassian
If you are on Windows:
git config --global core.autocrlf trueIf you are on macOS/Linux:
git config --global core.autocrlf inputHere we are configuring how we want Git to handle line endings. This is a very important configuration since each Operating System has its own way of handling line endings and would cause some weird errors when working in a repository that has multiple users using different Operating Systems to work on it.
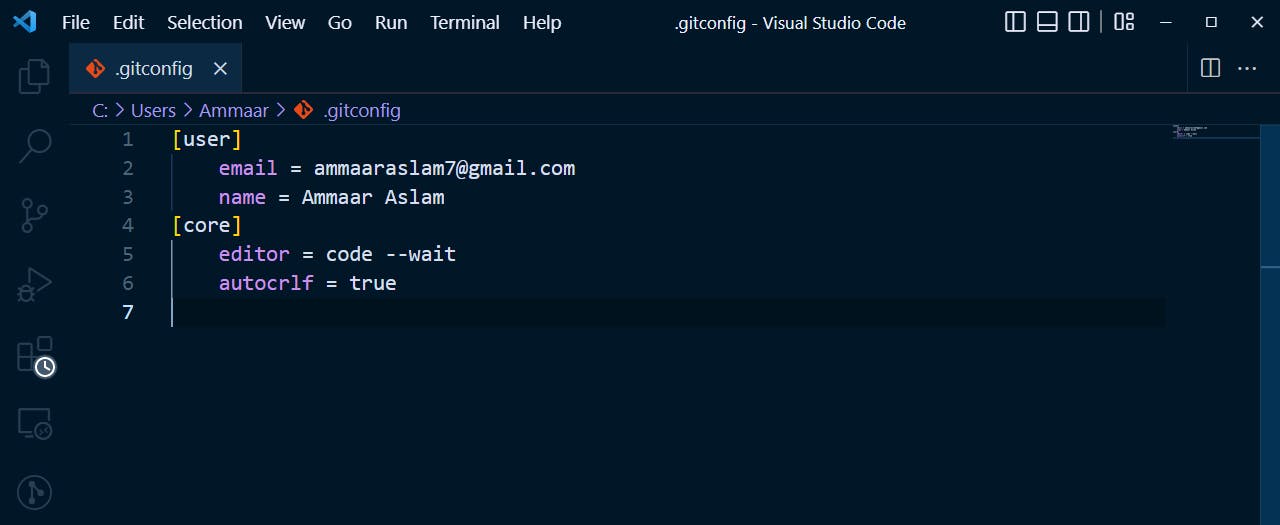
All the configuration settings we just made are stored in a text file called
.gitconfigwhich is usually stored inUsers/YourName/.gitconfig. Now to check that we have done everything correctly, enter the following command on the terminal/command prompt:git config --global -eIf you have been following this article and configuring correctly, this command should open a
.gitconfigfile in the default editor that you set while configuring. The configuration should be similar to the following:
Thanks for reading!
There you have it! You have successfully installed and configured Git on your machine. If you find this article to be useful, consider liking and sharing it with others. As I mentioned earlier, this is the second article of the Fundamentals of Git series. There will be more articles in the future that explains a lot more about git, its workflow, its commands, etc. So stay tuned for that too.
As always, if you have any questions or feedback let me know in the comments down below and follow me on Twitter for more updates on my journey, tips and tricks about programming. See you on another article this week! Cheers 🥂